These are great and inexpensive gifts to make for any occasion. I've made several of them to give as Christmas gifts. It has allowed me to do more gift giving this year than usual because of the affordable nature of the tiles and paints. You can give one of them as a gift or 2 or more as a set. Your friends will think you bought custom tiles for them and only you will know you did it yourself and on a budget! How great is that?!? Video Tutorial for this project.
I am finding more and more uses for my Cricut and growing collection of stamps. I could buy inexpensive gift tags for all of my Christmas presents, but what would be the fun in that for a crafter!?! These were fun to make and so easy to produce in bulk. I used one stamp set from MayMayMadeIt's etsy shop and only 3 Cricut images cut in two pieces, so simple. I cut the base of the tags from red and green card stock and the front of the the tag from Christmas themed patterned paper from Scrapbooking Made Simple. I fit 6 tags per 8 1/2 by 11 piece of paper/card stock. I then masked the "from" and stamped the snowman image. I also stamped the sentiment "Snow Peeking" on red and green card stock and cut them down to size and adhered them to the tag with foam mounting tape. Last finishing touch was coordinating baker's twine to tie them on the package with. Video Tutorial for this project.
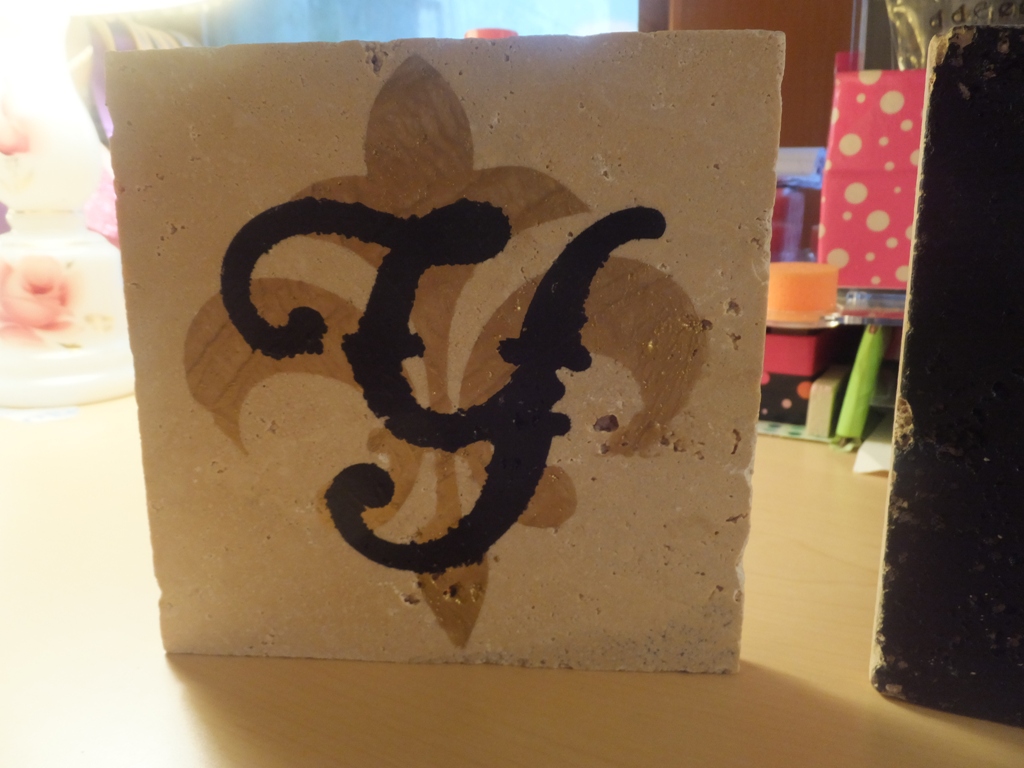
I love giving personal hand made gifts for special occasions that look expensive but are actually very affordable. For under $10 and with the use of stencils you can make custom home decor from your local hard ware store and your local craft store. Listed below are the products I used and here is the Video Tutorial for this project.
I've been cleaning out closets lately and stumbled across this empty wood frame. I didn't have any pictures that size that needed framing so I began to ponder it's other possibilities for a craft project. With the Holidays coming up I saw the potential for dressing it up in a temporary way for the each season. I went to Cricut Craft room to see what sort of Thanksgiving themed projects they had that would make a good wall decoration. I am very pleased with the outcome! I think it's fun, a little whimsical and will go so well with the rest of my Fall themed decorations. I've listed below the supplies as well as Cricut cartridges I used for this project.
My Dad's family and extended family get together every year for Thanksgiving but in the last few years it seems to be hit or miss. Since I've moved into the old family home, I don't think everyone, especially those from out of town, realized that I was continuing the family tradition. So this year I decided to do things a little differently. We usually call or email everyone to remind them of the get together and to let them know what dish we'd like for them to bring for lunch. But this year I thought it would be fun and interesting to send and invite with an RSVP and let everyone choose their own dish to bring, let it be a true pot luck lunch. And with plenty of time, as I sent these out at the first of October, I could plan to fill in any gaps in the menu that may occur. The response I've received so far from family far and wide is that they loved getting the handmade invitation and RSVP card. It seems that it made everyone feel quite special, not only for being personally invited but also because of the hand crafted nature of the card. You might want to consider something of this nature for your next big family get together. This simple invitation has already made this a Thanksgiving no one will ever forget.
I made the cards in assembly line fashion. Instead of making one complete card at a time, I repeated the same step on each card before moving on to the next step. For instance, I adhered the inside mat to each card then moved on to the next component for the inside of the card. It seems to me that repeating the same action over and over went more quickly than trying to make one cart at a time. I've attached the instructional video to this post so you can get a visual of assembling the cards.
I also hand made all of the envelopes from patterned scrapbook paper with the pattern on the inside of the envelope. It is the little touches like that that take the project to another level. It is so impressive looking with you open an envelope and there is this beautiful pattern to greet you!
I don't know about you, but I just think get well cards should be bright and cheerful. A sweet lady from my church had a little spill at home recently and I wanted to send her a card that would make her smile and brighten her day and while the cards in the stores are lovely, they all seemed a bit somber. So I chose a pack of paper with happy colors and card stock that matched. I then finished off the card with a lovely scripture - Jeremiah 17:14. It turned out so good and I really hope it made her smile through the pain she was suffering with. Video Tutorial for this project.
God bless my darling husband!! He sees all of the things that I make as works of art and was very bothered by the fact that I didn't sign or label my hand made goods in some way that let people know I made them. Due to his encouragement I decided to purchase a "Handmade By" stamp. Off to Etsy I went to find the perfect stamp that would suit my taste and personality. I was so pleased to find one that featured a butterfly. The butterfly has long been a symbol I relate to. It represents to me the struggles we go through before we emerge in beauty and take flight. I had been using my stamp on the back of cards and other paper crafting projects and then it occurred to me that I could make tags to put on items I've crafted that couldn't be stamped, like knitted objects. The idea of tags utilizing pretty scrapbook paper came to me so off to the computer and Cricut I went! After a long search, I settled on a fairly simple tag design with just a little flourish to it. These tags can be customized in so many ways to adorn any hand made object. I hope you enjoy the tutorial.


 : Flurdls
 : Font "Y" and "A"
 : Tag1 (base)
 Tag1-s (front)


 in - Light Blue, Black and Metallic Gold
 : BrdFlr-s "R"
 - F2 for all other lettering


 s - Rich Cocoa and Lady Bug
 : PlseJnUs
 : CardLyr
 : Plgrm1-s

 - Get Well Soon (Basic Tab)
 - Camel (Cross/Heart)


 : Tag1
 : Tag1-s
 : Frame4-s


